Tenant Location Switcher
Tenant Location Switcher allows you to support employees who travel frequently across different regions and to comply with General Data Protection Regulation(GPDR) requirements. For example, an employee based in the US who travels to Germany can print securely without having to install a new client component (i.e. Print Scout) on their laptops. Also, EU customers can keep their print data within the EU.
Note: The Tenant Location Switcher is designed for sites with multiple tenants. If this solution is not suitable for your print environment, you might want to explore the Data Privacy and Document Storage Feature as an alternative solution to address your data privacy requirements.
A user can easily switch between locations by selecting their preferred region in the Pharos Print desktop app (installed by the Print Scout).
Each region is completely separate. Users will not be able to see jobs they have submitted from one region and they will have to re-authenticate when switching regions.
How to install the Print Scout with Location Switcher
Step 1: Download the Print Scout from each region
The first step is to download the Print Scout from each region. For example, you can download the Print Scout from your US and EU regions. See the following documents for more information on how to download the Print Scout.
Step 2: Install the initial Print Scout for each region
Install the Print Scout for each region on separate machines. For example, install the downloaded Print Scout from the EU region on one machine and the Print Scout from the US region on another machine.
Step 3: Create the Deployment Settings file for each Print Scout (per region)
In this step, you'll be creating the Print Scout deployment package and configuration settings filethat will be used to mass deploy Print Scouts to multiple user workstations.
Windows
-
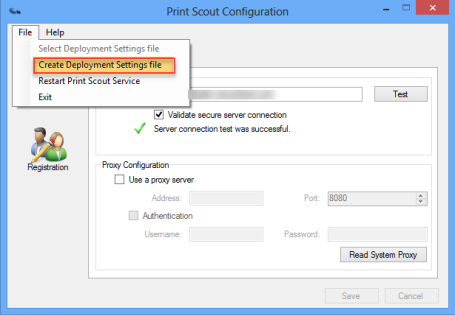
On the machines where you installed the first Print Scout, open the Print Scout Configuration tool (Configuration.exe) from the install directory (typically C:\Program Files (x86)\PharosSystems\PrintScout) .
-
Click the File menu and then select Create Deployment Settings file.
macOS
-
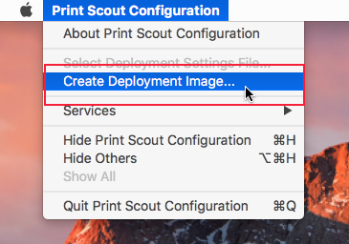
On the machines on which you installed the first Mac Print Scout, open the Print Scout Configuration tool from the directory /Library/Application Support/Pharos/PrintScout.
-
With the Mac Print Scout Configuration dialog active, open the menu and select Create Deployment Image.
- Click Save to create a deployment image. By default, the deployment image is saved to either the Desktop or the last used folder.
Note: You can save the deployment image to any location, but avoid saving it to this path /Library/Application Support/Pharos/PrintScout/AppData/Deployment. You will get a 'Permission denied' error and the deployment image will not be created.
You will see a progress indicator at the bottom of the Print Scout Configuration dialog box. When the process completes, you will see a .dmg file (disk image) in the specified folder.
Step 4: Locate the deployment setting files
Locate the deployment settings files for each of the Print Scout you installed. You will need these files to create the deployment package.
Windows
Locate the deployment files from C:\ProgramData\PharosSystems\PrintScout\Deployment .
- PrintScoutInstaller.exe - This is the repackaged Print Scout installer used for mass deployment.
- InstallConfig.ini - This file contains Print Scout configuration settings and customer registration information. This enables the registration of a group of Print Scouts to the Pharos Cloud server.
macOS
- MacPrintScoutInstaller.pkg - This is the repackaged Mac Print Scout installer used for mass deployment.
- InstallConfig.ini - This file contains the Mac Print Scout configuration settings and customer registration information. This enables automatic registration of Mac Print Scouts to Pharos Secure Release.
Step 5: Create a deployment package using the suggested folder structure and copy it to all the target user workstations.
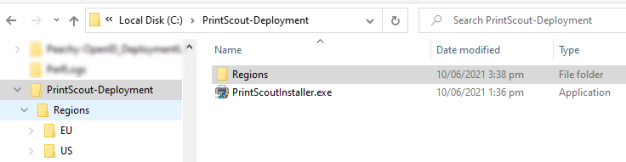
Using the deployment settings files obtained in Step 4, create a deployment package using the folder structure shown below. You will need to distribute/copy this deployment package to all the target user workstations.
When creating the folder structure, take note of the following:
- Make sure that the PrintScoutInstaller.exe or MacPrintScout.pkg is outside the Regions folder. You only need one PrintScoutInstaller.exe for the deployment package. You can select the PrintScoutinstaller.exe from any of the regions.
- Adding the PrinterDriver.zip (Windows) or PrinterDriver.tar (macOS) is optional.
- The region names shown to users in the Pharos Print desktop app are taken from the folder names at installation time (e.g. US, EU), so you will need to think of a name that makes sense to users.


Step 6: Distribute the folder structure created on Step 5 on all target workstations and run the Print Scout installer
Windows
- Execute PrintScoutInstaller.exe on your target machines, either locally or from a remote location accessible to the machine. Follow the on-screen instructions to complete the installation.
- The default region is set to the last region the Print Scout registers, which depends on how it is listed in the folder structure. If you want to specify the default region in the Pharos Print desktop app, you can add the /registration argument. Example: PrintScoutInstaller.exe /registration=<region>.
macOS
Using the Terminal application, run the following command to silently install the Mac Print Scout.
sudo /usr/sbin/installer -tgt / -pkg <path>/MacPrintScoutInstaller.pkg
Example: sudo /usr/sbin/installer -tgt / -pkg Desktop/QA-MacPrintScout/MacPrintScout.pkg
Note: For macOS, add a file called Registration within the region folder to specify the initial region. If you are using a text file, make sure that it does not have a .txt extension.
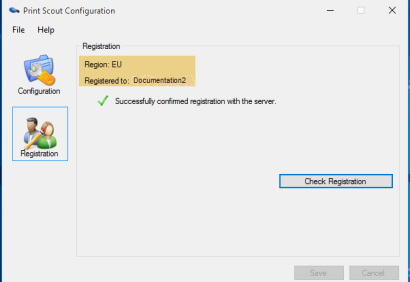
Step 7: Print Scout Configuration Registration
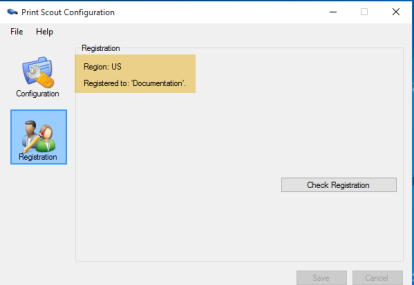
When the process is complete, click Finish to exit the installer. if the Print Scout Configuration tool opens, close it. The Print Scout is registered with the Pharos Cloud server as well as the regions.
Note: After the first region is registered, you will need to close the Print Scout Configuration tool to register the next region. Repeat this process until all the regions have been registered.
Related Topic: How to switch tenant locations